
Last year you may remember that I worked with Gousto and wrote a review on their delicious recipe boxes. These are great boxes which arrive with all of the ingredients and step by step instructions on how to create a restaurant style meal. We all really enjoyed the meals that we received. So when they got in touch with me again asking me if I would like to try their Bakedin Christmas recipe boxes that are perfect for little hands I could not turn them down. Now that the twins are three they love to help me in the kitchen when they get the chance so I knew that they would love this.

Bakedin have joined forces with Michel Roux to create a deliciously festive Snowflake Brownie box. We received two boxes, one for the twins and one for Joseph to bake with. Joseph also loves to bake, but he likes do bake independently. He is now 11 and wants to done things on his own so this box is an ideal way to raise his confidence in cooking. These boxes are a perfect way to help children bake more independently. All of the ingredients are labelled and pre weighed so all that the children need to do is add a couple of fresh ingredients, have some adult help when using the oven and they can make their own delicious treats.

Here is how the twins got on making their own Snowflake Brownie...
The twins took it in turn to add different ingredients. After I placed the butter in the bowl, I let them take over. This is what steps they did to make this delicious brownie...


Mash the butter with a fork into the sugar

Add the cocoa powder

Add the Belgium chocolate chips

Add the broken up pecan pieces

Add the cranberries, then an egg

Now for the fun, get mixing all the ingredients together!
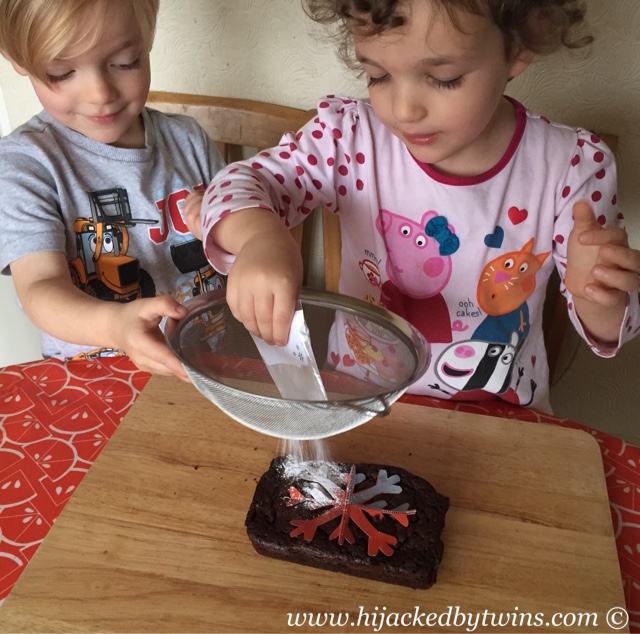
Once the brownie has thoroughly baked remove from the oven and leave to cool slightly. Within the pack is a star template to use to decorate the top of the brownie. Cut the star shape out and place the template on top of the brownie and sieve over the icing sugar. Gently remove the template and you should have a star design.


The twins took it in turn to add different ingredients. After I placed the butter in the bowl, I let them take over. This is what steps they did to make this delicious brownie...
Add the sugar to the butter
Mash the butter with a fork into the sugar
Add the cocoa powder
Add the Belgium chocolate chips
Add the broken up pecan pieces
Add the cranberries, then an egg
Now for the fun, get mixing all the ingredients together!
Once all of the ingredients have been mixed together spoon it into the prepared baking tray that comes with the kit and bake for 45 minutes.
Our star did not turn out as planned. But it really did not matter. The brownie was so delicious we were not disappointed about the lack of a star pattern!
As you can see from the pictures the twins thoroughly enjoyed baking the brownie, as did Joseph. They enjoyed the whole process of preparing the brownie to decorating it and of course they loved to eat the brownie. The hardest part of this was keeping them away from the completed brownie so that I could take pictures of the finished product. As you can see they were stood, eagerly awaiting the green light to tuck in!
The brownie was perfect. It had just the right amount of crunch on the top and had a perfectly gooey centre that contained a lovely nutty crunch along with the sweetness from the cranberries!
This is a recipe that we will definitely try to recreate again at home!

Disclosure: We were sent two Bakedin Christmas special boxes for the purpose of this post. No cash payment was received. All words, views and opinions are my own and 100% honest.
This looks like so much fun! I always find that I have the most fun cooking with Daniel if I get things out ready so we can just chuck them together and mix and so something like this would be perfect for us. They look really yummy too!
ReplyDelete